This tutorial shows how to create a simple API using ASP.NET Core Web API, deploy that API to the App Engine flexible environment, then use Cloud Endpoints to expose and monitor the API.
Step 1 - Setup your development environment
You will write code using Visual Studio Code. Therefore, you should install the following:
Step 2 - Create ASP.NET Core Web API using VS Code
- Open a command-line prompt and run the following commands:
mkdir ExposeAPIWithEndpointsCore
cd ExposeAPIWithEndpointsCore
dotnet new webapi
This will create a template Web API project using .NET Core 2.0. - Open the
ExposeAPIWithEndpointsCorefolder you created in Visual Studio Code. It will look like this: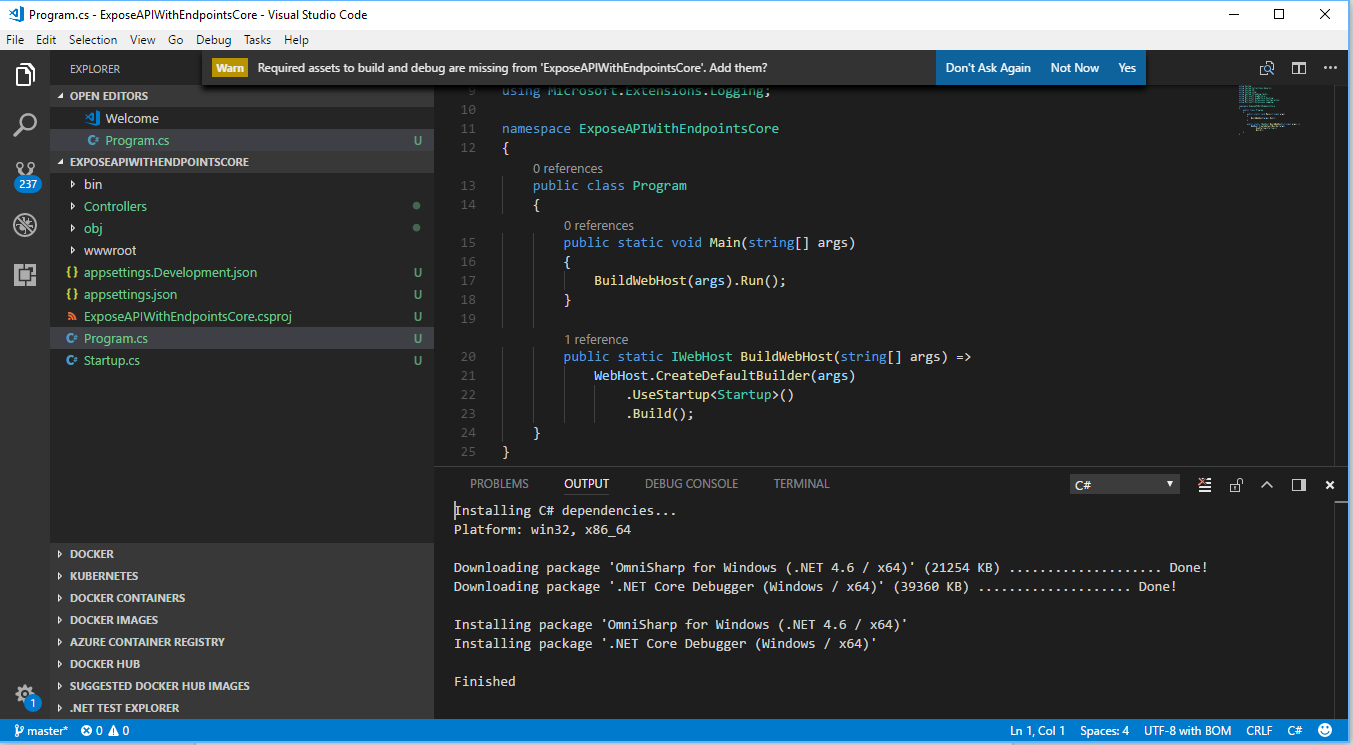
- Click on "YES" for "Required assets to build and debug are missing from ExposeAPIWithEndpointsCore. Add them?"
- Press
F5to build the template project. - Navigate to http://localhost:5000/api/values in your browser.This is the output you should expect: [“value1”, “value2”].Now we have a pre-built
"Values"controller in our sample project that exposes five HTTP REST APIs. Now we need to add OpenAPI support.OpenAPI is a set of specifications that describe REST APIs. It’s a format that is both machine and human readable. Originally this set of specifications was called Swagger but it was later renamed to OpenAPI. You can read more to understand the idea behind OpenAPI.We need it to deploy API specification to Google Endpoints later on. We have two options - either create OpenAPI specification manually, or use Swashbuckle tool that will auto-generate the specifications for us based on API definition. Of course, I prefer the second option. You will find it beneficial over time, as you make changes to the API. To add it, we need to add a few nuget packages: Swashbuckle.AspNetCore and Swaggerand then configure Swagger in our service startup. - In VS Code terminal, type this:
dotnet add package Swashbuckle.AspNetCore - Make changes in Startup.cs.
- In
"using"section at the start of the document, add this:using Swashbuckle.AspNetCore.Swagger; - In
ConfigureServicesmethod, add this:public void ConfigureServices(IServiceCollection services) { services.AddMvc(); // Register the Swagger generator services.AddSwaggerGen(c => { c.SwaggerDoc( "v1", new Info { Title = "My API", Version = "v1" }); }); } - In
"Configure"method, add this:public void Configure( IApplicationBuilder app, IHostingEnvironment env) { if (env.IsDevelopment()) { app.UseDeveloperExceptionPage(); } // Enable middleware to serve generated Swagger as a JSON endpoint. app.UseSwagger(); // Enable middleware to serve swagger-ui (HTML, JS, CSS, etc.), specifying the Swagger JSON endpoint. app.UseSwaggerUI(c => { c.SwaggerEndpoint("/swagger/v1/swagger.json", "My API V1"); }); app.UseMvc(); }
Step 3 - Create OpenAPI specification for our API
- Press
F5in VS Code. Browse to http://localhost:5000/swagger/v1/swagger.jsonYou should see Open API specification for our APIs in JSON format. However we will work with YAML representation of the same JSON. Even though Google Endpoints supports both json and YAML representations of OpenAPI, YAML is much more human friendly, so in case we will want to make manual changes to the specification, doing it in YAML file will be easier. - Copy the JSON content from the browser and paste it into https://editor.swagger.io. You will be asked whether to translate JSON to YAML. Say
YES. You will see this:
- Create a new file in VS Code under the main folder
ExposeApiWithEndpointsCore. Name itopenapi.yamland paste the content of the generated YAML from https://editor.swagger.io.Now we are ready to deploy the API to Google Cloud Platform!
Step 4 - Create a new GCP Project
- Create a new project at https://console.cloud.google.comWe will create App Engine Flexible Environment and deploy our API to it from the command line. So now we need to make sure that Google Cloud SDK is preconfigured to work with the project we just created.
- Open Google Cloud SDK command line in elevated mode (Administrator), and type the following:
- Update SDK components to the latest
gcloud components update - Make sure that gcloud has permissions to work with our cloud project.
gcloud auth loginThis will open a new browser window where you need to authenticate using your user account. - Configure default project for all subsequent commands we will execute:
gcloud config set project `YOUR_PROJECT_ID` - Create App Engine flexible environment to which we will deploy our API. You can find the list of supported regions here.
gcloud app create --project --region=`YOUR_REGION`
Now it's time to deploy the API specification and API implementation.
Step 5 - Deploy API Specification to Google Endpoints
- Open
openapi.yamlthat was created in step 3. - Add
hostdeclaration right before thepathssection. The value should beYOUR-PROJECT-ID.appspot.com(replaceYOUR-PROJECT-IDwith your Cloud project ID):swagger: '2.0' info: version: v1 title: My API host: YOUR-PROJECT-ID.appspot.com paths: /api/Values: get: tags: - Values operationId: ApiValuesGetWhen you will deploy API specification to Google Endpoints, it will create a new Cloud Endpoints service configuration with the name equals tohostvalue from ourOpenAPI yaml. Each endpoints deployment assigns a uniqueconfiguration_idfor versioning purposes. When we will deploy the service implementation to App Engine flexible environment in the next step, it will create a DNS entry in the format ofYOUR-PROJECT_ID.appspot.com. We should use that FQDN to make incoming requests to our API. - In Google SDK command prompt, make sure you are in the folder that contains
openapi.yamlthat was created in step 3. Execute:gcloud endpoints services deploy openapi.yamlYou should notice that the deployment shows a few warnings, such asOperation does not require an API Key. You can ignore these for now.So what has happened now? You just deployed API specification. This created a new Cloud Endpoints service configuration entry with the name that we specified in“host”field ofopenapi.yaml. This service entry is preconfigured to serve the API based on the specifications in yaml file. Now we want to ensure that all incoming API calls will be intercepted by Cloud Endpoints and then routed for execution to the service we deploy to App Engine flexible environment.
Step 6 - Deploy API implementation to App Engine flexible environment
Now you need to deploy API implementation. You also need to bind API specification we deployed earlier to API implementation instance, so that every incoming request passes through Cloud Endpoints service first, before it hits the deployment of API implementation.
When deploying App Engine flexible service, you should specify Endpoints service name in the
app.yaml. You should also set deployment rollout strategy to managed. By doing that, you instruct App Engine flexible environment to place an instance of Cloud Endpoints service in front of your API implementation. That instance is identified by service name and configuration id. By setting rollout_strategy=managed in app.yaml, we instruct the service to always use latest version of Cloud Endpoints service (the one that was deployed last).- In Google Cloud SDK shell type:
gcloud endpoints configs list --service=`YOUR-PROJECT-ID`.appspot.comThe output will show theCONFIG_IDandSERVICE_NAME. - Create
app.yamlfile in VS Code atExploreApiWithEndpointsCoredirectory. The content of the file should be:Runtime: aspnetcore env: flex endpoints_api_service: name: [SERVICE_NAME] rollout_strategy: managedReplace[SERVICE_NAME]with corresponding value of previous command output.By creatingapp.yamlwithendpoints_api_servicesection, we effectively created the binding that will ensure that every incoming request to our API (specification is detailed in configuration with config_id) that will hitYOUR-PROJECT-ID.appspot.com(“name”), will be routed to our service.Now you are almost ready to deploy API implementation into AppEngine Flex. In order to separate a project from its publish package in dotnet core, you should deploy the outcome ofdotnet publishcommand. That output by default doesn’t containapp.yamlfile we created earlier. - Edit
“ExposeAPIWithEndpointsCore.csproj”in Visual Studio Code so that it always copiesapp.yamlinto the publish directory by adding the content in this file to yourExposeAPIWithEndpointsCore.csprojfile right before the closingProjecttag. - Deploy API implementation to the App Engine flexible environment.
dotnet publish gcloud app deploy bin\debug\netcoreapp2.0\publish\app.yaml - Test that your APIs are exposed properly. Open
https://[YOUR-PROJECT-ID].appspot.com/api/Valuesin any browser. If you get ["value1","value2"] back, you are done!
Verifying the deployment
You now have the API deployed and exposed via Cloud Endpoints! To verify that, go to Endpoints page of Google Cloud Console. There you can inspect the requests graph, which should reflect the requests you make to test the API. You can also view all of the configurations of your endpoints deployments.

Summary
You created a basic ASP.NET Core Web API, deployed it to App Engine flexible environment on Google Cloud Platform and configured Cloud Endpoints in front of the API, so all the incoming requests will be sent to Cloud Endpoints which in turn will route them to API implementation. You haven’t implemented all the non functional requirements of exposing the API like security, throttling and monitoring yet. In this tutorial the API is exposed to everyone without any authentication.


I like your blog, I read this blog please update more content on hacking,Nice post
ReplyDeletevisual studio training
Thank you for sharing this article,
ReplyDeleteFind the best Dot net core web API tutorial now. Get high-quality notes and lectures from top experts with Technology Crowds. This Dot net core web API tutorial helps you to understand all the theories clearly. They give a lecture from a basic level.
Thank you Anjan Sir.
ReplyDeleteIf you want to know more about Dot net core web API tutorial then, visit here at Technology Crowds.